Wednesday, March 31, 2010

Happy Birthday, John!


Rachel here: This past weekend my beloved partner in crime (and our beloved illustrator) heralded the end of another year and the start of his next. He and I have a deliciously wonderful birthday tradition of baking each other specially requested birthday cakes. In the past, John has made me a cake in the shape of a Life car (like, from the board game...my favorite childhood board game because we didn't own it), tiered chocolate cake, flourless chocolate cake (ok, clearly a theme is emerging around what I usually ask for for my birthday)...the list goes on. Anyway, I, in turn, have dutifully made John a vanilla cake with vanilla frosting every year because, though he's anything BUT vanilla as a person, this is what he asks for. And so, this year I tried to up the ante a little bit, figuring I've been getting off pretty easy with this whole vanilla-vanilla thing year in and year out, and I endeavored to make his cake look like something...

a double chocolate stuffed golden oreo cookie (his latest obsession).

It didn't work.

First, I didn't have an exacto knife (as I was so sure we did) and so the stencil I tried to make had to be completely revamped at the last minute. Then, though absolutely freaking fantastic, the frosting that I made wasn't thick enough to function visually as whatever the "stuff" in oreos is and kept oozing down the sides of the cake.

And yet, the cake is totally totally good. The cake part itself is a little dense, but it's not too sweet which is nice for a cake and allowed for the chocolate, powdered sugar and whipped cream to shine through. Though I was a little disappointed not to have achieved my initial goal from the outset of my cake-baking endeavor, I was quite pleased with the end result (and I think the birthday man was, too). And, of course, I was delighted to celebrate another year in the life of my fantastic partner and best friend. To many more years, John, and many more cakes.

Rich and Tender Yellow Cake
from "The Best Recipe" by Cook's llustrated

Ingredients
4 large eggs, room temperature
1/2 c. whole milk, room temperature
2 tspn. vanilla extract
2 1/4 c. sifted cake flour
1 1/2 c. sugar
2 tspn. baking powder
3/4 tspn. salt
1/2 lb. (2 sticks) unsalted butter, softened and cut into 16 pieces

Method
Preheat your oven to 350 degrees and prepare two 9x1 1/2 inch cake pans with vegetable shortening. Line the bottoms of each pan with parchment paper and grease as well. Dust cake pans with flour, tapping out excess. In a small bowl, beat together the eggs, milk and vanilla. Measure out 1 c. of this liquid mixture and set aside. In your mixer, combine the dry ingredients, blending well. With the mixer running at its lowest speed, add the butter in one piece at a time, mixing until the flour and butter look sandy. Add the 1 c. of egg mixture and mix at the lowest speed until it's incorporated. Increase your mixer's speed to medium-high and beat everything until light and fluffy. Add the remaining egg mixture in a slow and steady stream. Scrape down the sides of your bowl and beat batter on medium-high until it looks slightly curdled. Divide batter evenly between your cake pans and smooth with a rubber spatula. Bake until golden brown and a toothpick comes out clean, roughly 25 minutes. Remove and cool in pans for 10 minutes on a wire rack before removing and letting cool completely before icing.

Chocolate Cream Frosting
from "The Best Recipe" by Cook's llustrated

Ingredients
1 1/2 c. heavy cream
16 oz. bittersweet chocolate, chopped fine
1/3 c. corn syrup
1 tspn. vanilla extract

Method
Bring cream to a boil. Pour over chocolate and add corn syrup. Let rest for 3 minutes. Whisk gently until smooth. Add vanilla. Refrigerate, stirring periodically, until desired consistency is reached. Try really hard not to eat (this stuff is seriously good).

Once everything was cooled, I assembled my two cakes with a layer of frosting between them. I cut out letters and hearts and whatnot and placed them on the top and sifted powdered sugar over to create the design. When I served the cake, I drizzled more of the frosting over it and added a dollop of whipped cream. I took a few pictures of the cake in this state, but they all came out blurry and, well, it was time to eat. It sure was pretty, though. Anyway, what do you like on your birthday?


Janet here: Regular readers know that I don't "do" cakes. (And by "do," I mean bake. Certainly I've been known to eat them.) Instead, we all get the homemade ice cream cake of our desire (click here for recipe). That said, I have nothing but admiration for Rachel and John's birthday cake baking plan and think it is quite a lovely family tradition all of their own creation. I can't wait to see the cakes they make their little bun in the oven.

Tuesday, March 30, 2010

Blogs That Make Us Hungry: Not Derby Pie


Rachel here: This week we're bringing back the blogs to Tuesdays (we've been featuring books for the past few weeks) and excited to do so with Not Derby Pie, a blog that my dear friend Jessica directed my attention towards. In the name of full disclosure, Jessica is friends with Rivka, the lady at the helm in the Not Derby Pie kitchen. This, however, is not why she steered me towards Rivka's site. No, she steered me towards Rivka's blog because it's AWESOME.

First of all, the girl can cook. I mean, I haven't tasted anything actually, but there is no way that with the breadth and variety that she embarks upon in her kitchen that she can't. Plus, her photographs are gorgeous, her recipes are clear and her general attitude towards cooking (you know, that it's fun and that normal people do it) is entertaining and endearing. She seems adventurous and excited about her culinary undertakings, a feeling I can totally relate to and appreciate. Anyway, I highly recommend clicking over to Rivka's blog and giving her some love. I'm confident you'll be glad that you did and a little hungrier for having perused her photographs and recipes as well.

Janet here: And I fell in love, love, love with her photos. Frankly, just about everybody who's doing a food blog has us beat in that category, but until we move up a notch technologically, I'm just going to have to have food photo envy. Rivka's post on Caesar Salad yesterday made me want to jump into the bowl. Seriously!

Monday, March 29, 2010

What's for Breakfast?


Rachel here: Ok, so I'm back. Get excited. For my first post this week I made waffles. To be honest, though, I really made waffles three times. I only photographed them the last time, though, when I made them for John's birthday breakfast (along with eggs scrambled with cheddar cheese and slices of apple). The first two times I made them were for myself last week. Those times I used leftover pancake batter (things with which one can eat maple syrup have become umm...important to me as of late...like, really important) figuring they would yield slightly lesser waffles, but delicious ones (and ones with maple syrup on them) all the same.

I was wrong.

The waffles I made last week using pancake batter were totally better than the ones I made for John's birthday breakfast (sorry, sweetheart). While the waffles I made for John (and which are photographed above...clearly they were still edible) were adequate, they grew tough quickly as they cooled (not the case with my pancake batter waffles). And so, though I have a few leftover and I will absolutely dutifully eat them, below I am going to post the waffle batter recipe from The Best Recipe by Cook's Illustrated in addition to the pancake batter recipe I adapted which, to my taste, worked out much better.

Also, I should confess that part of my waffle making frenzy was the result of a desire to make some and freeze them for down the road. And yet, three batters later, there are still no frozen waffles in my house. Oops!

Oh! One more thing. If savory's more your schtick, check out my ma's egg casserole down below. She didn't have a photo, but it sounds absolutely fantastic (as in, I want it for dinner). Enjoy!

Waffles
makes 4-8 depending on size of waffle iron

Ingredients
2 c. all-purpose flour
2 T. cornmeal (optional...I opted...it was only sort of noticeable)
1 tspn. salt
1/2 tspn. baking soda
2 eggs, separated
1 3/4 c. buttermilk
4 T. butter, melted

Method
First, get your waffle iron going. In a medium bowl, whisk together the dry ingredients. In a small bowl, combine the egg yolks and buttermilk. Beat the egg whites until they form stiff 2-inch peaks. Add the yolk/buttermilk mixture to the dries in a steady stream while mixing gently with a rubber spatula. Do not over mix. Towards the end, add the egg whites, folding them in until just incorporated. Batter should be lumpy and thick. Scoop batter into waffle iron and cook to desired crispness. Serve immediately and enjoy!

Pancakes Batter That Works for Waffles

Ingredients
1 c. all-purpose flour
2 tspn. sugar
1/2 tspn. salt
1/2 tspn. baking powder
1/4 tspn. baking soda
3/4 c. buttermilk
1/4 c. milk
1 large egg
2 T. unsalted butter, melted

Method
Turn waffle iron on. Whisk dry ingredients in a medium bowl. In a 2-cup measuring cup, combine buttermilk, milk, egg and butter, mixing well (don't add butter when it's super hot or it will cook your egg). Pour into dry ingredients and mix until just combined. Pour into waffle iron (or onto a skillet to make pancakes--just oil the surface first!) and cook to your desired crispness and color. Enjoy!


Janet here: This casserole will feed an army, so it is perfect for brunches or, as in the debut of this particular casserole, for a baby shower or some other kind of brunchy event. I have made it with sausage, bacon, grilled veggies and lox — all to rave reviews. Oh, yes, and it's simple.

Susan's Egg Casserole
serves 12-14

Ingredients
12 eggs
9 slices of white bread, crust cut off, and cut into 1/2" pieces
3 cups milk
6 scallions, diced
1/4 cup chopped, drained pimentos
2 lbs. sausage, cut up (or bacon or smoked salmon; your choice of meat goodies. I've done all of them at various points.)
2 cups grated cheddar cheese
salt and pepper to taste

Method
The trickiest part is just remembering you have to do this the night before cooking. Toss it all into a bowl. Mix. Put into a 9" X 13" casserole pan. Cover and refrigerate overnight.

The next day pop it into a 300-degree oven for 60 minutes and get ready to listen to the oohs and ahhs.

Friday, March 26, 2010

Salty or Sweet? Or Both?


Janet here: People tend to either fall into the salty or sweet category for their food fixes. My son, G, has been a salt freak almost since he started eating solid food, for instance. A bag of Doritos is not safe in our house if he's at home. I, on the other hand, am definitely a sweets freak, in particular chocolate. On the other hand, the piece de resistance in a hot fudge sundae is definitely the salty peanuts. That combination of salty and sweet is just perfect. Why do you think Reese's peanut butter cups are so divine?

One of my new cookbooks, called Salty Sweets by Christie Matheson, is devoted to this idea. She is a firm believer that just about any dessert can be improved by adding salt. These fabulous brownies are just one of the many fine examples in her cookbook that I recommend you check out ASAP. I've made two killer recipes from this book already (click here for post on great chocolate cupcakes) and I just know there are more to come.

What's your pick? Salty or sweet? And how do you satisfy it?

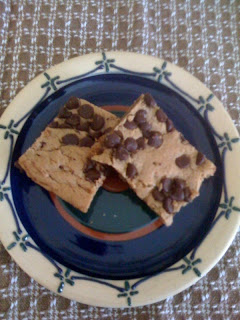
Butterscotch Brownies

Ingredients
2 cups all-purpose flour
1 1/4 teaspoons fine sea salt
1 teaspoon baking powder
1/4 teaspoon baking soda
2 cups dark brown sugar, packed
10 tablespoons (1 1/4 sticks) unsalted butter, melted
2 large eggs
2 teaspoons pure vanilla extract
1 cup chopped toasted pecans

Method
Heat the oven to 325 degrees. Butter and lour a 9X13-inch glass or ceramic baking pan.

Combine the flour, 3/4 teaspoon of the slat, the baking powder and the baking soda in a medium-size bowl.

In the bowl of a stand mixer fitted with a whisk attachment whisk together the brown sugar and the remaining 1/2 teaspoon salt so the salt is evenly distributed. Pour in the melted butter and whisk until well-blended. (I don't have this kind of mixer so I just mixed it with a fork in a bowl and it was fine.) Whisk in the eggs and the vanilla.

Add the lour mixture to the bowl, whisking until it's just incorporated. Fold in the pecans.

Spread the batter into the baking pan, distributing evenly all the way to the edges. (You can add 3/4 cup chocolate chips, either sprinkling on top or mixing into the batter. Also add a dusting of grinder seat salt on top to enhance the chocolate flavor (this is the Salty Sweets cookbook after all. This is an optional step that I did and it was delicious.)

Bake 30-35 minutes until the batter is completely set and the edges are starting to brown. Let cool in the pan on a wire rack for 10 minutes. Then chill the pan in the fridge for 30 minutes to one hour to help set the inside before cutting. The brownies will keep in an airtight container at room temperature for up to 3 days or up to one month in the freezer.

Thursday, March 25, 2010

Food for Thought Thursdays: The Emptying Nest


Janet here: There's an irony to starting up this food blog with Rachel this year after talking and thinking about it for at least two years: I soon will have only one person to cook for.

Rachel has been out of the house for six years now, but middle son, G, is graduating from college this May and likely (hopefully) leaving for parts and adventures unknown rather than taking up a spot on the family room couch, and youngest son, S, is graduating from high school, which means his days at the kitchen table in any regular way are numbered. So I find myself exploring the world of food and cooking and nurturing in an ever-expanding way just at the very moment that the people I'll be cooking for are evaporating. Seems just a tad ironic, don't you think?

It's been 25 years since I made a meal for two and I wonder if I'll remember how to do it. Sure, we can use the leftovers for busy nights and yes, I do cook for one of the most appreciative audiences in America (my husband, Peter, eats anything and everything and openly and loudly voices his praise, and has done so for almost 30 years), but somehow it is still a little sad. Our family is shifting; I imagine that Peter and I will be spending more time sitting at our children's tables as they gradually begin their own families, and that the times of cooking for the clan, moments I've loved and cherished and, yes, sometimes was sick of doing, are going to be come more rare. It's the natural course of things and many moments of fun with family will still be shared, but I'm slowly becoming second in command rather than the general, and the reality is that just feels a little strange.

Wednesday, March 24, 2010

Nutty for Nuts


Janet here: Our family has kind of a nut thing going, specifically with Aunt Ruby's peanuts. I know it may sound like hyperbole, but these are the best peanuts in. the. world. Seriously, once you've had an Aunt Ruby's peanut, you will never ever eat another peanut in your life again that's not made by this North Carolina family company and think it's actually a real peanut. These peanuts are that good.

It was brave of me, then, to even try introducing another kind of nut into the Reynolds' house given Aunt Ruby's mythic presence in our home and that my husband, Peter, is practically on Aunt Ruby's Christmas card list because he's ordered so many cases of these nuts over the years. I mean he doesn't let the case — yes I wrote case, not can — get down to fewer than two cans before he's reordering. The man is that addicted.

But I decided to persevere after finding this recipe from — yes, it's true — Ellie Krieger's cookbook, The Food You Crave. Ellie didn't let me down. The nuts were gone within the week. Watch out Aunt Ruby; Ellie is on the way.


Ingredients
1/2 cup raw pecans
1/3 cup shelled raw pistachios
1/3 cup raw cashews
1/3 shelled raw pumpkin seeds
1 tablespoon pure maple syrup
1/2 teaspoon curry powder
1/8 teaspoon cayeen pepper, or to taste
1/2 teaspoon dried rosemary
1/4 teaspoon salt
cooking spray

Method
Heat oven to 325 degrees. Combine the nuts and seeds in a medium bowl. Add the maple syrup, spices, rosemary and salt. Toss to combine.

Coat a baking sheet with cooking spray. Then transfer the coated nuts to the sheet and spread evenly in a single layer. Bake, stirring once, until the nuts are fragrant and lightly toasted 15-20 minutes. Remove from the oven and let cool. The nuts will keep in an airtight container in the refrigerator for up to 2 weeks.

Tuesday, March 23, 2010

Books That Make Us Hungry: Comfort Me with Apples


Janet here: As Rachel mentioned last week, we thought we'd occasionally offer up our thoughts on our favorite food-related books on Tuesdays, and there is no better place for me to start than with Ruth Reichl.

The last editor of Gourmet magazine before it was sadly killed last year, Reichl was, prior to that and in no special order, a restaurant critic for the New York Times, food editor and restaurant critic for the LA Times, and the author of the bestselling Tender at the Bone. I haven't read that memoir yet, although I did read her book on her mother, Not Becoming My Mother (great title and wonderful book). I found Comfort Me with Apples while cleaning out my mother-in-law's house and grabbed it immediately. I am so glad I did.

Reichl holds nothing back in this book, which takes up presumably where Tender left off with her first gig as a freelance food writer for a now-defunct California magazine. She lived in a commune in Berkeley with her long-time boyfriend, eventual husband, Doug, an artist. It's not long into her gig that she begins an affair with another serious foodie, her editor (never a good idea in general to get involved with your boss). She doesn't stay with him, but she learns a great deal from him as he exposes her to all kinds of food, especially during a memorable trip to Paris. By the time they part, she has evolved — as a woman and as a food writer/critic.

Reichl's writing about the food is so clear and descriptive you feel as if you're at the table with her. While I personally wouldn't want to eat all the foods she describes — I prefer my brains in my head for instance — I felt as if I could understand their wonder thanks to her beautiful prose.

Added bonus? The book is interspersed with recipes. I can't wait to try her crab cakes. She cooks them right after the first of many awkward phone calls with Doug as their relationship dissolved. That turning to the familiarity of cooking while under duress is a place I've been many times and is just one of the many many honest moments she shares in this book.

Monday, March 22, 2010

Food on the Go: Energy Bars


Janet here: I'm soloing this week while Rachel and John get a mini-vacation at some sprazzy four-star hotel in Carmel that Rachel somehow scored a deal on. I normally would feel a little bitter about that but since I just returned from St. Croix, I can't really complain. Anyway on to the post. I'm a big snacker. I could quite happily nosh my way through life; in fact when I first moved into the condo Peter and I were going to start living together in — I was teaching summer school in Connecticut and he was teaching summer school at Harvard before starting law school in the fall — I never even turned the stove on the entire summer.

So while I write a food blog and generally love to cook, I often don't eat that way when I'm on my own. Ironic, yes? And also probably the kind of a thing a therapist would find interesting. Hmmmm. Anyway I also often get so caught up in my day that I wolf down my lunch or forget about it entirely until 2 p.m., at which point I'm starving and not near anything remotely luncheon-like. At these moments, I definitely tend to reach for something less than healthy when I'm on the go. I try to think ahead and bring a piece of fruit and/or a Luna bar or something, but the reality is I mostly reach for something with chocolate. It's a lifetime habit of satisfying myself with something sweet even though I know the resulting boost is only temporary and that there are a lot better ways to get some energy.

One of the benefits of doing this blog is that I'm more aware of eating healthily — I can't just feature desserts and cookies all the time now can I? — so I was pretty excited to try these energy bars by my new favorite cookbook author, Ellie Krieger. This particular recipe is from her cookbook, The Food You Crave, which I highly recommend. I've now made at least five recipes from the book and they're all winners and, very important to me at least, easy and not very time consuming.

These last about a week in an airtight container but they can also be frozen if you individually wrap them in saran wrap, and then just bring them out on a need-to-eat basis...which will probably be fairly soon after you freeze them. Do you have a go-to on-the-go snack food? We'd love to hear about it.


Energy Bars


Ingredients
1 cup quick-cooking rolled oats
1/2 cup shelled unsalted raw sunflower seeds
1/2 cup toasted wheat germ
1/4 cup whole wheat flour (I used all-purpose and it was fine)
1/2 cup dried apricots
1/2 cup raw almonds
1/2 cup raisins (I didn't have any so I used dried blueberries)
1/2 cup pitted dried dates
1/2 cup nonfat dry milk
1/2 teaspoon ground cinnamon
1/3 cup pure maple syrup
2 large eggs

Method
Heat the oven to 350 degrees. Coat a 9X13-inch baking pan with cooking spray.
Place all the ingredients except the maple syrup and eggs, in a food processor and pulse until everything is finely chopped. (I don't own a food processor so I put them in the blender and hit chop and it worked fine.) Add the syrup and eggs and pulse until the mixture is well combined. It will resemble a coarse paste. (I hit pulse on my food blender but all that happened is the light blinked, so I poured the whole mixture into a bowl and mixed by hand with a fork and everything was fine. Just want you other food Luddites to know you don't have to have the technology to make this recipe work.)

Transfer to a baking pan and spread evenly to cover the bottom. Bake until lightly browned, about 20 minutes total. Allow to cool 15 minutes; then cut into 24 bars. Store in an airtight container at room temperature for about 3 days or wrap individually and freeze up to 3 months.

Friday, March 19, 2010

Fried Goat Cheese Medallions


Rachel here: So, for my final solo post before my mother returns to our little blogosphere I had big plans to make scallion pancakes. I found a recipe that seemed pretty straight forward and I had most of the ingredients plus the time required (they're simple to make but involve a lot of waiting for dough to chill and such). It ended up being a gorgeously and unseasonably hot day, though, and I ended up taking a long walk and drinking slushies with John and then just not feeling like spending that kind of time over the stove. And so I went back to the drawing board, craving a dinner that would feel as summery as the day had.

What I arrived at was a salad with fried goat cheese medallions. For the salad I used toasted walnuts, scallions, mini heirloom tomatoes, kalamata olives, lemon thyme and mixed greens. I whisked together a simple dressing of olive oil and balsamic vinegar, figuring the tartness would go nicely with the goat cheese. I served the whole thing with baguette and John and I dug in for a dinner that reflected the freshness and warmth and simplicity of these first warm days.

Fried Goat Cheese Medallions
makes as many as you want--just buy the appropriate amount of cheese

Ingredients
goat cheese--I used 4 oz. to make 8 medallions. Also, I used plain, though you could buy it with herbs or add herbs yourself depending on how you're serving.
bread crumbs--I made mine fresh in my food processor using two pieces of bread. This was a good ratio and adapt it as needed.
egg--I used one. If you are working with any more cheese, use two.
fresh cracked pepper
olive oil

Method
To set yourself up, get your bread crumbs into a medium sized bowl and whisk your egg(s) thoroughly in another. Crack fresh pepper in a small bowl as well. Divide your goat cheese into small circles, roughly 1/4 inch thick and 1 1/2 inches wide. One at a time, dip each medallion in the egg, sprinkle with the pepper and coat in bread crumbs. Re-dip each into the egg and then back into the bread crumbs if needed to get a complete coating. You want each medallion completely (although not too thickly) covered before frying. Once you've prepped all of your medallions, heat the olive oil in a skillet (I used 3-ish T. and this was a good amount, so adapt according to the amount of cheese you're working with). When it's good and hot, drop the medallions in. Flip them once the undersides are golden brown. Blot on a towel before serving. Enjoy!

Thursday, March 18, 2010

Food for Thought Thursdays: Victory

Rachel here: I had an interesting conversation the other night that led me to completely change my mind about what I wanted to share for this post. For over four years now I have been seeing a wonderful, kind, patient, insightful, no b.s. therapist who I will call C. For the last 6 months or so I have seen her with less regularity than I had leading up to that point, feeling like there hasn't been major work I've wanted/needed to do. Anyway, when I saw C earlier this week I mentioned this blog, something I had evidently not mentioned to her before. Seriously, the woman stared at me, wide-eyed and with her mouth slightly agape. What? she said and I felt confused for a moment, unsure of what I had said that caught her so off-guard. And then I started piecing it together.

For years and years of my life food has been THE site of control for me, a source of simultaneous agony and ecstasy that I have clung to and privately defined myself by. When I was younger there were periods of overeating and as I grew older I swung in the opposite direction, starving for years. In both dynamics, though, food was a means to access numbness, a path to physical and psychical disconnection from my body. My journey to learn to eat, to learn to feed myself, has been a long and uphill battle. It is a trip that I don't imagine will ever end, only one that I will have better and better maps for navigating.

For the better part of last year I felt like I had really conquered my problems with food. Then I got pregnant. Becoming pregnant sort of shoved my nose in my relationship with eating, exposing both the progress and the problems that continue to flourish there. Yes, I had come a long way in my four years with C, but yes there was/is still a ways to go. I had gotten to a point of viewing food as fuel, now I needed to see it as actual sustenance for life...oh yeah, and I had to gain a ton of weight while I was at it. There have been days where I feel furious at my body's needs for food, where I wish I could somehow eat like I did this time last year (very healthily and just to the point of ending hunger) and that all the nutrients would go straight to the baby. There are also days (and more and more of them!) where I relish in this project, delighting in identifying varied and interesting ways to get all sorts of goodness to the baby (since she can taste now) and feeling really connected to taking care of myself. It is day-to-day, though, which I guess really isn't all that different from how it's been since I first started seeing C and she told me to eat a few bites of food whenever my cat did (I am like, completely in love with one of my cats because, no joke, she showed me the baby steps towards learning to feed myself in a more viable fashion).

And so, this blog is a victory for me. It is an invitation from my mother and myself to view food as fun, as exciting, as nourishing, as my friend. If someone had told me a year ago that I would be doing this I probably would have nodded and smiled (to keep up my "oh yeah, I'm totally good with food" facade) and thought, "oh HELL no"...hence C's reaction when I mentioned it in therapy earlier this week. I have always enjoyed baking and cooking (in spite of my at times debilitating fear of consuming the end products), but to genuinely enjoy eating is a rather new and novel space for me to occupy. It feels good. I feel closer to whole, like my body and my brain are finally co-habitating. And you know what? I feel damn proud of myself, too. Plus, it feels great to have my mom right by my side during this shift, witnessing and guiding and celebrating all of this change together. Thank you all for watching me grow.

Wednesday, March 17, 2010

Mini Orangey Blueberry Oatmeal Muffin Bites


Rachel here: One of my major pregnancy cravings is oranges. I like the fruit, I like the juice, I like the artificial flavor...you name it, if it tastes even remotely orangey I probably want it (and I also probably don't particularly care to share). This is odd to me because in my entire life up to this point oranges have never held much sway over my taste buds. I've never been anti-orange per say, just never been one to seek an orange out. And now, seriously, I need to eat an orange (or orange-related something) on a daily basis or I am simply just not quite satisfied. This is a deliciously strange shift in my eating patterns.

Anyway, this orange-centric eating pattern I've developed leaves me desiring new and interesting ways to bring the orange into my daily diet. I'm also trying to eat healthy so that our baby grows big and strong and whatnot (and because, generally, eating healthy really appeals to me). And so, I ventured into the kitchen and concocted my very own mini-muffin recipe to try to satisfy both of these interests.

The muffins I developed are little things and are sort of like the runt cousins of pretty, super sugary and floury muffins. They are absolutely scrumptious, though, and I've been throwing a few in my bag each morning on my way out the door to nibble on when I get a little peckish. They've really been hitting the spot. Plus, I'm always just amazed when I generate my own recipe and the food actually comes out remotely resembling what I was thinking of, so I'll admit to cherishing these little nubbins a little extra on that count.

Anyway, I hope you enjoy the recipe. If orange isn't your thing you could use lime or lemon zest instead. I'm also a fan of using clementines, but I didn't have any around when I was baking. Also, know that you can go lighter on the zest depending on how strong of a citrus flavor you're looking for. Obviously, per my incessant orange cravings, I went as heavy as I dared and these are certainly quite orangey as a result.

How do you incorporate your favorite fruits into your food (besides the topnotch way of whole and raw)?

Mini Orangey Blueberry Oatmeal Muffins Bites
makes 12

Ingredients
4 T. butter
1/2 c. dark brown sugar
1/2 c. buttermilk
1 large egg
1/2 tspn. vanilla
1/4 tspn. salt
1 tspn. cinnamon
1/2 c. all-purpose flour
1/2 c. rolled oats
1/2 tspn. baking soda
zest from 1 large orange
1 c. blueberries
demerara sugar (for tops, optional)

Method
Preheat oven to 350 degrees and line your muffin tin. Beat the butter and brown sugar until fluffy. Add buttermilk, egg and vanilla and mix (this will be very wet). Add salt, cinnamon, flour, rolled oats and baking soda and mix until just combined. Fold in zest and blueberries. Fill muffin tin and sprinkle demerara sugar on top. Bake, rotating halfway through, 20-25 minutes until firm to the touch. Cool on wire rack before removing.

Tuesday, March 16, 2010

Books That Make Us Hungry: "I Like You: Hospitality Under the Influence" by Amy Sedaris

Rachel here: Until today, my ma and I have featured blogs on Tuesdays (under the monicker Blogs That Make Us Hungry). Today, though, we are branching out to include books on Tuesdays (this isn't a goodbye to blogs, just a branching out). I couldn't be more delighted, either, with the book I chose to kick this off (sorry, Ma! we never discussed this and I hope you like my choice...): "I Like You: Hospitality Under the Influence" by Amy Sedaris.

I was given this book as a going away present by my coworkers at my old job the first time I quit (yes, first time...but that's a story for another day). It is one of my favorite books that I own and I have read it cover-to-cover (including taking the dust jacket off to admire the poster of a sprinkles-coated Amy). Filled with themed parties, recipes, and general do-it-yourself gumption, there is not a page in this book that won't make you laugh. Amy (like her brother David Sedaris) is nothing short of hilarious and in this marvelously twisted and perverse fashion that I am rather in awe of. She rigs ashtrays out of clamshells, shamelessly places collection jars out for her pet rabbit, and includes information for how to tell which drugs people are on. The best part, though, is that buried beneath this glorious mountain of kitsch are some recipes that actually work. I keep swearing that one of these weeks I'm going to do right by my love for Amy and actually make one of them.

Anyway, if there's a doubt in your mind about whether or not you should step away from your computer and purchase this book immediately (or don't step away and click on the link above), ask yourself this: Am I awesome in a way that perhaps too few people appreciate? If the answer is yes, then Amy's the gal to join you in your entertaining and culinary endeavors.

Monday, March 15, 2010

Pesto Chicken Salad


Rachel here: So, my mom's on vacation this week in St. Croix with my dad and S while G is off in Florida participating in some ungodly spring break scene and I, little old me, am left with the blog all to myself. It oddly conjures feelings of having the house to myself while growing up. Anyway, in case any of you are worried about whether my mom will be enjoying herself enough this week or not, she sent this photo to assure us all that she's well.


If you want to join me in a moment of bitterness, feel free to.

But anyway, I digress (oh, and I really can't complain since John and I are off for our own little vacation in a week or so). It was sort of exciting to think about what I wanted to make for the blog this week without any input from my mother (though, in typical mom fashion...and I use "mom" to refer to mom-esque behavior generally and specifically...my mother had plenty of ideas that I should "feel free to use"...I told the woman to chill out and go on vacation). Initially, I decided I was going to teach myself to pickle so that, when she came back, my mom would have a moment of bitterness towards me comparable to the one I experienced when I received her photo (see above). Then I realized that, though I really do want to learn to pickle, perhaps the person who would be left with feelings of bitterness would be me instead of her if I tried to cram pickling 101 into a weekend filled with a million other tasks. So, I filed pickling for a later date.

What I decided to make in the end (for this post) was pesto chicken salad. John and I have been eating it at Meal Ticket on a near weekly basis as of late and I figured it would be fun to try to duplicate it for our very own at-home consumption. I looked in Chez Panisse Cooking (by Paul Bertolli with Alice Waters) and was delighted to discover they had a simple pesto recipe. All I needed to pull this one off perfectly was a mortar and pestle, something I figured I could pick up at our fantastic local grocery store, Berkeley Bowl. When I was at the store, though, I discovered that they only had mini mortars. This seemed ridiculously tedious to me and so I figured I could rig something on my own at home. Let's just say that though this whole dish turned out fantastically (if I do say so myself), I will not be making it again without a mortar and pestle.

For the chicken part, I bought a small whole chicken and made chicken stock with it to cook it. We were out and homemade stock is so much better than anything you can buy at the store and plus, I figured this would be a good way to kill two birds with one stone. I will post the stock recipe another time (unless anyone's dying for it, in which case leave a comment and I will post it sooner). Once the chicken was done I just shredded it by hand and tossed it in the pesto. The ratios were perfect. The pesto really could have been used on any number of things, though, and is a deliciously simple recipe. What do you like your pesto on?

Pesto
I doubled the recipe, so feel free to halve it

Ingredients
1/2 c. pine nuts, lightly toasted
6 cloves garlic
4 c. basil leaves, finely chopped with a sharp knife (dull knives=lost flavor)
1/2 c. extra virgin olive oil
1/2 c. melted butter
3/4 c. Reggiano Parmigiano cheese
1/4 tspn. salt
1/4 tspn. freshly ground black pepper

Method
Using a mortar and pestle (or, the end of a wooden handled spatula and a pyrex bowl...no, don't do this...go buy a mortar and pestle), smash the pine nuts and garlic into a paste. Add the basil leaves, a few tablespoons at a time, and mash into a coarse paste. Add the olive oil and continue to grind mixture into a paste. Once the paste is smooth (or smooth enough for your liking...mine was pretty rustic but, again, I was mortar and pestle-less), use a rubber spatula to incorporate the cheese, salt and pepper, and melted butter.

I promptly dumped this all over my chicken (which I had shredded into a large bowl) and tossed. I suggest always serving warm . The first time we ate it with greens and tomatoes tossed in balsamic vinegar. The second time we ate it with cornbread and slices of tomatoes (again, with balsamic vinegar...the stuff is an excellent balancer for the richness of pesto). And yes, those two times were within 24 hours. Anyway, give it a try and let me know what you think!

Friday, March 12, 2010

Cornbread=Good


Rachel here: In my book, corn bread is one of the great things to eat. Obviously it's not fancy, but it sure is delicious and, fresh from the oven, few things are quite as certain to put a smile on my face. I made the recipe I'm posting below for the first time this week to compliment my pork, black-eyed peas and greens (posted earlier in the week). It was insanely easy to prep and start to finish took me 30 minutes. It's pretty basic and definitely would lend itself well to variations (for instance, next time I think I might sprinkle a bit of demerara sugar on top or add some cheese and bacon to the dry mix). While it didn't blow my mind, it definitely hit the spot and, for its ease, the recipe gets a major thumbs up. Shock of shocks, I grabbed the recipe out of my go-to ("The Best Recipe" by Cooks Illustrated).

Golden Northern Cornbread
serves 9

Ingredients
1 c. yellow cornmeal, preferably stone-ground
1 c. all-purpose flour
2 tspn. baking powder
1/2 tspn. baking soda
4 tspn. sugar
1/2 tspn. salt
2 large eggs
2/3 c. buttermilk
2/3 c. milk
2 T. unsalted butter, melted, plus extra for greasing pan

Method
Preheat oven to 425 degrees and grease a 9-inch metal pan (the recipe calls for a square pan, but I just used a pie plate and all was well). In a large bowl, whisk together the yellow cornmeal, all-purpose flour, baking powder, baking soda, sugar and salt. Form a well in the middle of the bowl by pushing the dry ingredients to the side in a circle. Crack the eggs in the whole in the middle of your fry ingredients and stir them lightly (the recipe calls for the use of a wooden spoon but I just used a spatula and, again, everything turned out fine). Add the buttermilk and then the milk. Stir all of the wet ingredients and then mix everything in the bowl together until just combined. Add the melted butter and finish mixing. Pour the batter (it's a wet batter, just so you know) into your pan and bake 20-25 minutes until golden brown on top. Let cool for 5 to 10 minutes on a wire rack before serving. Enjoy!

Janet here: Sadly, the family I cook for prefers its cornbread from the Jiffy box rather than something homemade. As son S said after I made the Barefoot Contessa's jalapeno cheddar cornbread, thinking I would be sitting through dinner listening to rave reviews, "Cornbread is not meant to be messed with." So there it is.

At any rate, I will tell you that this recipe is mighty tasty and the next time I'm having people over who have corn bread taste buds, I will mix up another batch of this and S will obviously not be among those sitting at the dinner table.

Jalapeno Cheddar Cornbread
makes 12 large pieces

Ingredients
2 cups all-purpose flour
1 cup yellow cornmeal
1/4 cup sugar
2 tablespoons baking powder
2 teaspoons kosher salt
2 cups milk
3 extra large eggs, lightly beaten
1/2 pound (2 sticks) unsalted butter, melted plus extra to grease the pan
8 ounces extra-sharp cheddar, grated, divided
1/3 cup chopped scallions, white and green parts plus extra for garnish (3 scallions)
3 tablespoons seeded and minced fresh jalapeno peppers (2-3 peppers)

Method
Combine the flour, cornmeal, sugar, baking powder and salt in a large bowl. In a separate bowl, combine the milk, eggs and butter. With a wooden spoon, stire the wet ingredients into the dry until most of the lumps are dissolved. Don't overmix. Mix in two cups of the grated cheddar, the scallions and jalapenos, and allow the mixture to sit at room temperature for 20 minutes.

Meanwhile heat the oven to 350 degrees. Greast a 9 X 13 X 2-inch baking pan. Pour the batter into the prepared pan, smooth the top and sprinkle with the remaining grated cheddar and extra chopped scallions. Bake for 30-35 minutes or until a toothpick comes out clean. Cool and cut into large squares. Serve warm or at room temperature.

Thursday, March 11, 2010

Food for Thought Thursdays: the Candy Drawer


Janet here: As I contemplated becoming a parent, among the many things I pondered was how I would navigate food, and while there was an abundance of things I had no intention of repeating with my children — forcing them to clear their plate due to starving children in India is just one example — I was very clear that we would absolutely have a candy drawer. I didn't want my sons to play with guns but I was certainly not going to deprive them of sugar. (The gun idea went out the window when my mother-in-law gave one to G for his fourth birthday, proclaiming my anti-gun idea "ridiculous." That, of course, is a story for another day.)

Although my friends could snack at will in their houses, obviously making their homes pretty popular among the neighborhood kids, only my house had a candy drawer. True, I had to ask permission to actually open the drawer and get something out, but it was such a wonderful treat. I never knew what I would find when I opened the drawer after my mother went shopping. Sometimes it was Twizzlers; other times it was M&Ms or Reese's Peanut Butter Cups. The actual candy was kind of irrelevant; the point was that opening that drawer was a little piece of Christmas every time.


Rachel here: You know, I'd never thought of this before, but I think that the candy drawer may be the source of my undying love for sugar. Sure, my brothers are both capable of not consuming sugar on a daily basis, but I seriously feel a little emptiness lurking in some dark corner of my stomach/heart (they're sort of interchangeable at times) if I go a day without anything sweet. And, as was the case for my mother when she was growing up, the candy drawer at my house when I was growing up made our home a living legend of sorts amongst my friends. I mean, you can see the picture above...it's AWESOME.

The thing about the candy drawer, though, which is indicative of my mother's general approach to food with us, was that food was not forbidden (except for soda...a line she drew that remains a bit of a mystery to me, although I guess soda is more unwittingly habit forming than a candy bar...or certainly a chance to consume a boat load of sugar without realizing it in a way you might be less prone to when you have to unwrap and chew each saccharine caloric portion). It's not like we ate a bunch of crap all the time or anything (we didn't have sugary cereals and you couldn't just eat sugar whenever you wanted), but I think the idea was more that denying children food who are learning how to relate to their bodies and its needs is a silly and discouraging exercise. If you want chocolate, eat it! Just don't eat it endlessly. We got to learn, with guidance from our folks, that moderation is a good thing and this is a lesson I am grateful to have been brought up with...plus, it tasted good.

Wednesday, March 10, 2010

I'll Have a Side of ???


Janet here: Deciding what's for dinner only starts with the main item on the plate (chilis and stews aside obviously). The right "sides", as they say in the restaurant business, make or break a meal.

As a vegetarian, figuring out food combinations becomes even more critical because you don't have the meat entree dictating the meal. You have to become more creative pretty quickly and, frankly, I think making this transition is one of the main reasons people interested in eschewing red meat actually never make the leap: they just figure it's too hard to work out the rest of the plate.

I know I certainly felt that way when I decided to give up red meat over 30 (!) years ago. Without that piece of meat to center the plate, how exactly do you figure out how to put together a meal? Thanks to the Moosewood Cookbook, which was my bible in those beginning years, I realized you don't need a blob of meat on the plate to make a meal work. I got more creative, I think, because I was liberated by the constraints of thinking I needed a meat protein, vegetable and starch staring up at me from the plate in order to have a complete meal.

Anyway, we decided to do a side this week and, no surprise to anyone who has spent any time with me or read much of this blog, I picked broccoli because I am a broccoli freak. It's funny because I didn't love it as a child and I didn't even eat it that much as a child. But now I eat it every chance I get and have to stop myself from serving it more than twice a week with dinner.

Mostly I stir fry it in various ways so I was happy to come across this recipe for Dirty Broccoli in Ellie Krieger's cookbook, The Food You Crave. It's the first time I have ever microwaved a vegetable and I have to say I will probably stir fry it in the future before adding the bread crumb part. I just like my vegetables crispier. That said, it's a tasty, quick way to serve up this wonderful vegetable. What's your favorite way to serve broccoli?

Dirty Broccoli
serves 4

Ingredients
1 bunch broccoli (about 1 1/4 pounds)
1 tablespoon water
2 tablespoons
2 cloves garlic, minced
1/4 plain dry bread crumbs
1/4 teaspoon dried oregano
1/4 teaspoon salt
pinch pepper

Method
Cut the broccoli into spears and put in a large microwave-safe bowl with the water. Cover tightly and microwave on high for five minutes. Carefully remove the cover, drain the broccoli well, and set aside.

While the broccoli is cooking, heat the oil in a large skillet over medium heat. Add the garlic and cook fo rone minute. Add the bread crumbs, oregano and salt and cook, stirring. Cook until the crumbs are toasted and gold brown, about two minutes. Add the broccoli, toss to coat with bread crumbs and serve. (This is pictured with Ellie's salmon cakes...recipe to come soon.)


Rachel here: So, this post is a continuation of my post from Monday. Below you will find my recipes for black-eyed peas and collard greens. Tune in Friday for cornbread and have yourself a feast this weekend!

Collard Greens

Ingredients
2 bunches collard greens, rinsed, trimmed and chopped
half of a large ham hock (or use bacon instead)
40 oz. of chicken stock
1 T. white vinegar
salt and pepper

Method
Place greens in a large pot with ham hock or bacon. Add chicken stock, vinegar and salt and pepper. Bring to a boil. Reduce heat to low and simmer for at least 1 hour. The greens will get notably darker and the bitterness will be largely cooked out (although you want a little of that bite to balance the sweet pork). The liquid will reduce but never disappear, so just serve with a slotted spoon.

Black-eyed Peas

Ingredients
1 pound black-eyed peas, rinsed
5 c. water
the other half of your large ham hock
salt and pepper
2 bay leaves

Method
In a large pot, combine all ingredients (I cut the ham hock into large pieces and dispersed it throughout). Bring to a boil. Reduce to a simmer and cook uncovered until the peas and ham are tender (around an hour and a half). Remove ham and cut meat away from fat and skin. Chop meat up and stir back into black-eyed peas.

Yummy!

Tuesday, March 9, 2010

Blogs That Make Us Hungry


Janet here: I love my name in no small part because it's not that common. I was one of only three Janets in my entire school system growing up and I loved it. All those Marys and Bills struggling to differentiate themselves. Not the Janets.

Not surprisingly, I was obviously curious, then, to discover a fellow food blogger with the name Janet and clicked through to her blog, Janet is Hungry. Lo and behold it was a post about some kind of fabulous chocolate and peanut butter confection. Clearly we are soul mates.


While Janet doesn't post a ton, what she does post is doable, varied and easy to follow. I like that in a cook and will absolutely be getting on her chocolate peanut butter mud pies ASAP.

Rachel here: Chocolate and peanut butter are two of the absolute greatest things of all time and when coupled together they are simply magical (if done in the right proportions). When my mom sent me perusing this blog I initially suspected it was just on the grounds that the woman's name is Janet (yes, this is not the first time I've heard my mother sing the glories of her name...and yes, Ma, I am busting on you but no, it's not because I don't agree that you have a great name...it's just my obligation as your child). Then, though, I saw the top recipe and I knew it was because my mom had found her soul mate. I looked through the rest of Janet's blog and liked her variety as well as her gumption (she seems totally down to try anything and to seek what she desires). I definitely recommend checking her out.

Monday, March 8, 2010

Pulling Our Weight: Pork and Chicken


Rachel here: Had John and I not already decided to make this little union of ours official under the eyes of the law before I first developed this recipe, I would be completely convinced that he married me for this meal. I imagine that when I am having one of my more, shall we say, difficult days that John thinks of this meal and it helps him get through my raging, take-no-prisoners, psychotic pregnant hormones. I was proud of it the first time I made it because I developed the whole thing myself (a personal first, I think). Then, when I put it on the dinner table and John began to dig in, I became exceedingly proud as he looked up at me between mouthfuls and said, "You really do love me, after all. This is the first time you've really fed me right." Of course, this is an exaggerated statement (John is nothing if not an appreciative partner); however, the sentiment that I had really hit the nail on the head made me beam. Like, my face hurt. It was awesome.

Anyway, since that fateful evening when I finally did right by my man I haven't made this recipe a second time (the accompanying sides, which I will post about later in the week, feature a lot of bacon...enough that neither of us would feel good eating this with regularity and enough that eating it is incredibly satisfying). This go around I did a few things differently (I made more pork for one thing since we were supposed to have company for dinner, though illness intervened in that plan, and I also used ham hock instead of bacon for the sides) and I feel like the recipe worked just as well. Anyway, give it a try and let me know what you think.

Falling Off the Bone Pork
feeds 2 to 4 depending on how many chops you use

Ingredients
2-5 pork chops (depending on size and how many people you're looking to feed)
1-2 large white or yellow onions, sliced (more onion for more pork)
1+ cup of apricot jam (to your taste)
3 c. dark and hoppy beer (I used Rogue's Mocha Porter)
2 T. white wine vinegar
garlic powder
chili powder
salt and pepper
olive oil

Method
Season your pork chops in olive oil, garlic powder, chili powder and salt and pepper. Place them in the biggest pan you have over medium-high heat, browning both sides (approximately 4 minutes per side). Place the sliced onion on top of the chops. Combine 3 cups of beer with your cup of apricot jam to taste and pour into pan. Add white wine vinegar (if your beer doesn't have much bite to it, you might want to add more vinegar). Bring to a simmer and reduce heat to medium-low. Cover and cook for at least 2 hours, until the meat falls off the bone (if you're not sure if the meat is falling off the bone, it isn't...this is one of those awesomely obvious moments in cooking).

Tune in Wednesday and Friday to learn about the rest of what I do for this meal (including cornbread, which isn't pictured below)...


Janet here:
Or if pork isn't your fancy (it may be "the other white meat" but it isn't according to my food lexicon so I don't "do" pork) instead try this barbecue pulled chicken.


I had never made this before and, frankly, I think I missed out on a couple of decades of serving dinner to some picky kids who would have loved this. Oh well, maybe I can win points with grandchildren or lure my nearly-adult children back for a dinner if this is on the menu.

I got this recipe from my new favorite chef, Ellie Krieger (I'll be back, Ina!) whose recipes I clearly will be copying for quite a while since I have two of her cookbooks (see post on her muffins from So Easy, which are great!) and have yet to make a bad recipe. This recipe is perfect when you have had a rough day at work or with the kids and want something really easy. Unlike Rachel's pulled pork, which seems pretty labor intensive to me, this recipe relies on picking up a rotisserie chicken! Love that! The sauce is made from scratch, though, so this completely counts as a home-cooked meal, again referring to that personal food lexicon. Click here and enjoy!

Friday, March 5, 2010

Soup du Jour ... Or Not

Rachel here: Ok, so obviously soup was the name of the game for this post. My mom and I seem to both really enjoy soup (which is sort of funny since I don't recall eating it much when I was growing up, but anyway) and when we were caucusing last week about this week's posts and I was stressing out about my looming midterms, soup seemed like the perfect meal to make. It would have been, too...

So, the other afternoon I decided that I would make soup with the various vegetables in our fridge that were about to turn or of which we just had awkward bits left. Things started out spectacularly as I sauteed celery, carrots, shallot and a bit of onion in olive oil (with a little butter for good measure). I felt so pleased with myself for retaining some of the information I've been made privy to living with John, with this as a really great way to start soups as an example. I was thoroughly enjoying my break from studying, too, and so when I looked in the fridge and discovered a mere half-cup of chicken stock I didn't bat an eye. If I could tackle 3 midterms and a paper in addition to a million pages of reading this week, I could certainly overcome a serious stock shortage. I looked in the door of the fridge and saw a bit of tomato juice and thought, "Eureka! All will be well."

HA!

I added my chicken stock and whopping cup of tomato juice to the soup and things were smelling pretty good, though I was acutely aware of needing to come up with way more liquid if this had any hope of not just being a pot of mushed vegetables. Out of the corner of my eye, on top of the refrigerator I eyed an opened bottle of red wine. "Jackpot," I thought.

Now, in case you were at all curious, you can't make soup with wine. You just can't. I poured almost half a bottle of wine into my soup pot and the next morning my house still smelled like a sorority. Sure, a little wine can be a lovely thing in a soup, but using it as the bulk of your stock (ok, obviously there is no such thing as wine stock and this should have been a major clue to me prior to my generous pour) is just nasty. Like, really, truly, awfully nasty. All I can say is, should you find yourself in a similar situation, I suggest pouring yourself a glass of wine and ordering take-out instead.

And so, I abandoned the soup. In a moment of total type-A-ness, I planned on making soup the next night so I could save face for this post. I told my mother (much to her cackling delight) about my faux pas, though, and she and I agreed that we're not here to blow your mind, we're here to tell you about our lives through recipes. Let's just say this is a recipe that, if all goes according to plan, won't be making a reappearance in my life. My ma's recipe below, however, looks absolutely scrumptious.


Janet here: Soup is my go-to supper when I want to make sure there is something tasty for dinner sometime later in the week. It's easy to make ahead, uses up all kinds of ingredients (if that's part of your intent), and it's cheap. One of my favorite soup cookbooks is Soup Suppers by Arthur Schwartz. This is a man who fully understands the heft a good soup can have as a meal. Just add a little salad, maybe some bread and cheese, and you are good to go. Now that's my kind of weekday meal.


Tuscan Bean Soup

serves 6-8

Ingredients
1 pound dried cannellini
1/4 cup extra virgin olive oil
1 medium onion, finely chopped (about one cup)
1 medium carrot, finely chopped (about 1/2 cup)
1 medium potato, cut into 1/4 inch cubes (about 1 cup)
1 3/4 chicken or beef or vegetable stock
2-3 fresh sage leaves, 2 teaspoons dried leaf sage or 1/4-1/2 teaspoon marjoram
3 large cloves garlic, coarsely chopped
6 cups water
salt and pepper to taste
1/2 of a 10-ounce package frozen chopped spinach or kale, defrosted or 2 cups finely shredded kale or 2 cups finely shredded Savoy cabbage


Method
Soak beans overnight in cold water to cover (or at least several hours)
In a 4-6 quart saucepan, warm the olive oil and saute the onions and carrots until tender, about 10 minutes. Add the potato, broth, sage and garlic.

Drain the beans and add them, along with enough water to cover, about 6 cups. Cover and bring to a boil. Reduce heat, partially cover and simmer steadily for 40 minutes to one hour until the beans are very tender

Ladle out half the beans and pass them through a blender or food processor. Add them back to the soup. Continue to simmer. Season to taste. Add the spinach or kale or cabbage and simmer about 15 minutes more.

Serve in bowls topped with thin croutons and a drizzle of olive oil.

Thursday, March 4, 2010

Food for Thought Thursdays: Scary Spice


Janet here: At first glance, my spice rack does not seem to be a problem ... except this is not the only place I store spices, as this other photo will illustrate.


I'm not proud of my spice storage, and as I get more into uncluttering my life — thank you Erin Doland of Unclutterer — this spice issue is making me a little crazy. I remember walking into my friend Julia's home when she and John first moved it. It was a lovely home, but the thing that would have made me buy it without walking beyond the kitchen was this fabulous former fold-down ironing board in the wall that had been turned into a secret spice storage area. I would kill to have something like that.

In my day job as the editor of a home and lifestyle magazine (among others), I wander through people's homes and invariably lust after their kitchen storage space, in particular their spice areas. Secret storage areas by the sides of stoves that slide out and let you see the spices and/or food from both sides in particular make me drool.

Given that our kitchen is a set size and a renovation (other than new counters — ours are embarrassingly dated, but that's another story) are not in the budget cards, I'm going to have to become creative. A friend suggested turning my current utensil drawer into a spice spot. That, of course, would mean cleaning out some other drawers, which really means I'm talking about redoing all my kitchen storage. A few years ago, I became fed up with the invariable tumbling out of Tupperware and errant plastic storage bins minus covers etc. that happened every time I opened that cabinet to get something to store leftovers in. I pulled everything out, matched up the tops and bottoms, and threw out the rest. The new family rule is nothing goes in there without its top on.

Maybe it's time to tackle the rest of the kitchen. What are your storage solutions?

Rachel here: When we moved in January it was one of those moves where there were few things we were sorry to leave behind in our old apartment (besides the memories and our fabulous walk-in-closet-turned-bedroom). There was, however, a built-in spice rack over the stove that I find myself missing on the regular at our new place. Cooking in the old apartment meant not having to hunt for spices and, instead, while stirring your soup just reaching up for a pinch of cayenne or whatever you needed. Not so much in the new apartment. The spice rack,however, was really the only good thing about the old kitchen. In our new place, we have a walk-in pantry filled with shelves and cupboards and a massive kitchen (with original turn of the century hardwood floors) in which I appreciate the space to move and cook every time I'm making food. My solution so far has been to create a spice drawer. In addition to spices, I keep my cupcake/muffin liners, rolling pin (which has a metal core for freezing and I am in love with and a better baker for owning), toothpicks and cookie cutters. It's not a perfect system (though it will be as I accumulate spices, one of those inevitabilities in life it seems), but things don't shift around too much currently and, with the tops of the jars labeled and the drawer right by the stove and main prep area, it's pretty darn convenient.


A note here about my mother and me. I am somebody who (sadly?), for fun, will go through all of her cupboards/drawers/bookshelves/whatever and reorganize them. One time in high school my family left me home alone for a week and I cleaned out and organized my mother's entire pantry (what I found in there I will keep between her and me). Last summer when John and I were visiting I pulled everything out of her linen closet, refolded and re-stacked and reordered...for fun (it just crossed my mind that this might drive her insane). As you can see, my mom and I are not exactly birds of a feather when it comes to my (admittedly sort of sick) propensity for giving things a neat and precise place. I think our spice situations speak to this a bit. Someday I will bite the bullet and show you the inside of my cupboards (where everything is in a labeled mason jar) or my linen closet, but until then I think I'm going to spend a little time envying my mom's more, shall I say, relaxed approach to life. Where do you fall on this spectrum?

Wednesday, March 3, 2010

Cook Once, Eat Twice


Janet here:
Much of my current cooking life involves cooking ahead because I work out of town part of the week and I want to make sure my husband and son don't starve. I mean a duo can only eat so many hamburgers and fries, I don't care how delicious Peter's version is. So I assuage some of my traveling guilt by cooking ahead.

What I have realized in the two-plus years I've been doing this is that it's actually a brilliant idea to cook ahead one day of the week and ensure you've got stuff to heat up easily when you come home from a trying day at work. I can remember my children asking me in the car on the way home from school/music lessons/sports/day care what was for dinner. My standard response, because I hadn't really figured it out and was feeling kind of tired myself, was, "Arsenic" or "Ardvaark noses," depending on my mood. Why didn't I think of cooking ahead decades ago? Imagine the peaceful bliss of walking in the door, popping something in the oven and everyone happily playing together while the food warmed up ... or something like that.

At any rate, this recipe I've adapted from the original Moosewood Cookbook by Mollie Katzen is great the first time and reheats beautifully. I hope you learn something from my story and cook at least one meal ahead. It'll change your life.

Russian Macaroni
serves 6-8

Ingredients

1 1/2 cups sour cream
2 cups cottage cheese
1 cup grated cheddar cheese
1 red onion, thinly sliced
2 cups shredded cabbage
1 carrot, chopped
1 teaspoon caraway seeds
worcestershire sauce to taste
salt and pepper to taste
2 cups macaroni

Method
Boil the macaroni in water until al dente. Drain.
Heat oven to 350 degrees.

While the macaroni is cooking, combine the sour cream, cottage cheese, cheddar cheese and onion in a large bowl.

Saute in butter the cabbage, carrot and caraway seeds until the cabbage is wilted and just beginning to brown.
Add the sauteed ingredients and drained pasta to the large bowl. Stir until combined. Place in a casserole. Bake covered for 40 minutes. Easily microwaved for reheating.


Rachel here: Ah...reheating. I have three midterms this week, in addition to a paper due and 600 pages of reading. It's one of those weeks that the mere anticipation of is enough to make my stomach churn a bit. It's also one of those weeks that leaves me wanting to eat quick and easy comfort food. While I can't say that pizza won't be ordered in my house in the coming days, I can say that tonight it will be nice to sit down to a warm bowl of reheated homemade chili (for the recipe, see my post here). When I originally made it a few weeks back, I made a giant batch. John and I ate a bit of it, I gave a bit away to a friend of mine with two kids (oh, dinner is the best surprise), and I froze the rest in portions in microwavable containers that just need to be pulled from the freezer. Tonight, healthy heartiness (as opposed to the greasy deliciousness that is pizza) will fill our bellies and it will feel good. What do you stockpile in your freezer for these crazy weeks?

Tuesday, March 2, 2010

Blogs That Make Us Hungry:


Janet here: Having started this food blog with Rachel just six weeks ago, I have been amazed at two things: the number of food blogs out in the blogosphere and the number of terrific ones. It can make me feel more than a little anxious if I think about it too long, as in those kind of self-esteem-crushing thoughts like Who do I think I am to be doing something like this? Self-help guru Wayne Dyer called that kind of thing self-defeating behavior, something I tried to banish after my starter marriage.

Anyway, the blog that makes us hungry this week is Eat Make Read. As an avid reader, I was intrigued by the title. Then I fell in love with the simplicity of the recipes (Kelly features one for grilled cheese and apple sandwiches) and that she features DRINKS. I don't make drinks — ever. (That's another long story for another time.) But I love drinking good drinks and so far I haven't found many blogs that feature drinks. Her post on Manhattans and happy hour made me think fondly of my husband, Peter, who recently created a winter drink just for me called the Cranberry Corker after I told him how much I envied that he could drink Manhattans; they just look so wintry and seem like the perfect drink for a cold winter's day. In the summer I'm a gin-and-tonic gal and it just seemed so boring to only drink wine in the winter, so I was very happy when he presented me with the corker, which is also made with tequila, another favorite of mine.

But I digress. If you're tired of blogs that seem really complicated and make cooking look like something only special people can do, check out Eat Make Read. This is down-to-earth talk about food.

Rachel here: Ok, so I'm pregnant (in case you haven't been following or umm...seen me lately) and Kelly's blog leaves me seriously itching for a stiff drink. Her approach to food is refreshingly unpretentious and so is her tone, but (like mother, like daughter) it's the drink component that really grabs me with her blog (maybe we should have called this post: Blogs That Make Us Thirsty). Her drinks, like her food, are presented with simple and clear instructions that ooze accessibility and scrumptiousness all at once. I highly recommend checking her blog out, although perhaps waiting until 5 pm (although, of course, it's always 5 o'clock somewhere). Enjoy!